
Preventing Bubbles in Professional Window Tinting
Table of Contents
- Why Preventing Bubbles in Professional Window Tinting Matters
- Window Tint Installation Preparation: The Foundation for Bubble-Free Results
- Causes of Bubbles in Window Tint: Air, Water, and Debris
- Professional Installation Technique: Squeegee Method and Water Removal
- Window Tint Curing Time: What to Expect and How Long Bubbles Take to Clear
- How to Fix Peeling Window Tint and Prevent Future Issues
- Common Installation Mistakes That Cause Bubbles
- Frequently Asked Questions
Last Updated: October 21, 2026
Why Preventing Bubbles in Professional Window Tinting Matters
Preventing bubbles in professional window tinting separates a clean installation from one that looks rushed.
At HB Auto Sound OC, we understand that the most common complaint isn't tint color or heat rejection, it's bubbles that appear days or weeks later.
This guide covers what causes bubbles, how to prepare your workspace, the techniques that matter most, and what to expect during curing.
Window Tint Installation Preparation: The Foundation for Bubble-Free Results
Installation preparation is where most bubble problems start, a rushed prep phase sets you up for failure before the film touches glass.
Glass Cleaning and Surface Contamination Removal
Clean glass is non-negotiable. Any dust, dirt, or residue left on the window becomes trapped beneath the film, creating visible spots and anchoring air pockets that won't release.
Start with a thorough cleaning:
- Use a clay bar or specialized glass prep solution to remove bonded contaminants
- Wipe the entire surface with a lint-free cloth, working in one direction
- Pay special attention to the edges and corners where debris collects
Skipping the clay bar is a mistake: bonded contaminants like bird droppings, tree sap, and industrial fallout won't come off with soap and water alone, and they create tiny bumps that trap water and air beneath the film.
Environmental Controls and Workspace Setup
Workspace temperature and humidity directly affect how the film behaves. Film is pliable in warmth, brittle in cold, and airborne moisture can get trapped beneath it during installation.
Control your environment:
- Keep the workspace between 65°F and 85°F for optimal film handling
- Maintain humidity below 55% if possible, dry air helps water evaporate faster
- Work in a clean, dust-free area away from fans or open doors
Cold film is harder to work with and prone to creasing; warm film flows and conforms more easily. In a cool garage, run a space heater for 30 minutes before you start.
Causes of Bubbles in Window Tint: Air, Water, and Debris
Not all bubbles are the same. Understanding what you're looking at helps you fix it correctly.
Air Bubbles Versus Trapped Water
Air bubbles form when the squeegee traps air between film and glass.
Water bubbles contain trapped moisture. They're larger, more irregular, persist for days or weeks as water evaporates, and are the most common bubble complaint.
The fix differs: air bubbles need better squeegee technique, water bubbles need proper water removal and curing time.
A third type exists: debris bubbles. These form around dust or dirt particles stuck to the glass.
Dirt and Debris Trapped Beneath the Film
Debris trapped beneath film creates permanent imperfections. A speck of dust becomes a visible bump. Larger particles create noticeable spots that catch light.
Debris gets trapped when the glass wasn't cleaned thoroughly, dust settles on wet glass before application, the workspace isn't controlled for airflow, or the installer rushes without checking for contamination. Once trapped, it stays trapped, the only fix is removing and reapplying the film to that section.
Professional Installation Technique: Squeegee Method and Water Removal
Technique separates clean installations from mediocre ones. The squeegee controls water and air, but how you use it matters more than the tool. A complete fluid-management workflow has four stages: initial set, primary evacuation, edge work, and final inspection.
Setting the Film Before You Squeegee
Before the first stroke, center the film with even gaps at every edge and spray generously with application solution so it floats and can be repositioned. Mix slip solution to the manufacturer's ratio, too slick and the film slides, too lean and it grabs and traps air.
Anchor the film with a single light pass down the center, then work outward.
Squeegee Angle, Pressure, and Stroke Overlap
Three variables determine whether water leaves or gets trapped: angle, pressure, and overlap.
- Angle: Hold the squeegee at roughly 45 degrees to the glass. A flatter blade skips over water; a steeper blade digs in and can crease the film.
- Pressure: Use firm, even pressure, enough that the blade flexes slightly and you can see the water line being pushed ahead of it. Pressure that is too light leaves a film of water behind the blade; too heavy risks stretching or marring the film.
- Overlap: Overlap each stroke by about a third of the blade width. Gaps between strokes are where water pockets survive and later become bubbles.
Work from the center outward and top down on vertical glass so gravity assists evacuation. Keep the blade in full contact through the entire stroke, lifting at the end is the most common way installers introduce finger bubbles.
Working Fluid Toward an Edge Without Creating Fingers
Finger bubbles are elongated air pockets that form when the squeegee loses contact or changes direction mid-stroke, almost always a technique problem, not a film problem.
To prevent them:
- Complete each stroke fully to the edge before lifting the blade
- Keep pressure constant through curves and corners rather than speeding up
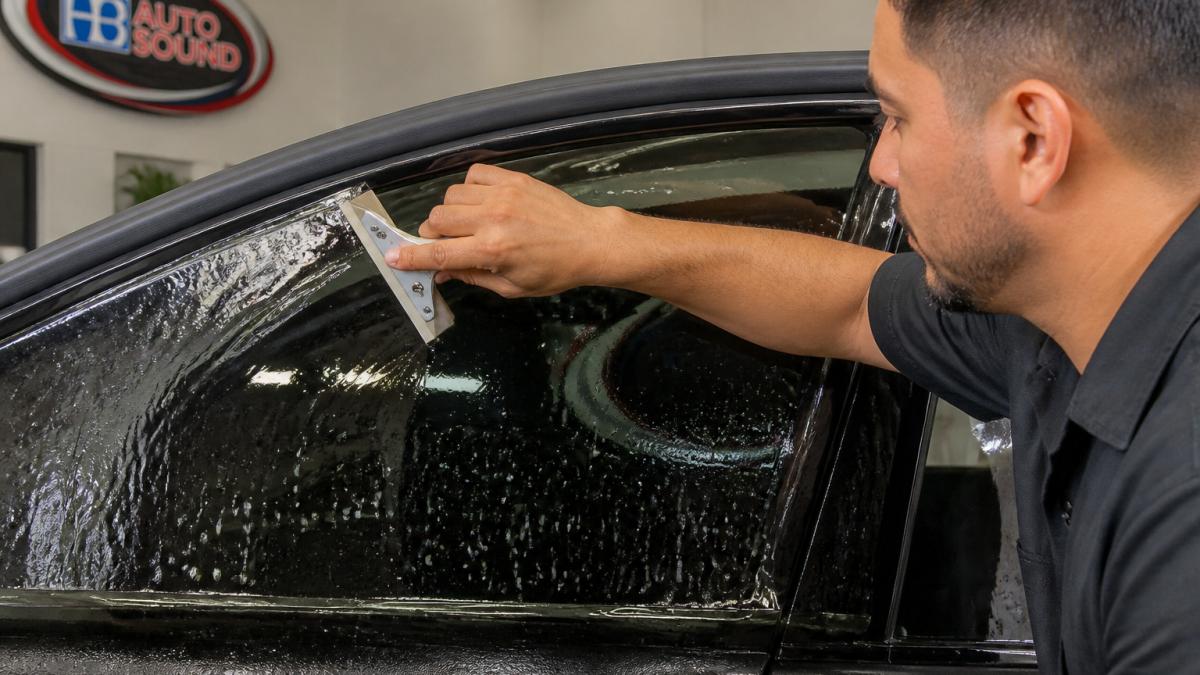
- Use a hard card wrapped in a low-friction sleeve for tight corners and defroster lines, where a full-size squeegee cannot maintain contact
A useful mental model: you are herding water, not smashing it. Each pass should move the water line visibly toward an edge. If water isn't moving, adjust angle or pressure before adding more passes.
Multiple Passes and Water Removal Discipline
Water removal is active, not passive: the more water you evacuate during installation, the less remains to evaporate during curing and the fewer bubbles appear later.
A practical sequence:
- Primary evacuation pass, center outward, overlapping strokes
- Second pass, perpendicular to the first to catch water the first pass pushed sideways
- Edge pass, light pressure around the full perimeter
- Inspection pass, backlight the film and look for water lines, fingers, and trapped specks
Many installers stop after the first pass. Squeegee multiple times instead, each pass reduces moisture and shortens curing time.
Matching Technique to Film and Glass Type
Technique isn't one-size-fits-all. Thicker and ceramic films resist conforming and need slower, deliberate passes. Curved rear and compound-curved side glass require heat shrinking before final squeegeeing, skipping it is a leading cause of fingers along curves. Always follow the manufacturer's published instructions for slip ratio, squeegee type, and post-install handling; they override general guidance when they conflict.
Window Tint Curing Time: What to Expect and How Long Bubbles Take to Clear
Curing is where patience pays off, but only if you can tell normal curing from a defect. Use this framework to decide whether to wait, monitor, or rework.
What Normal Curing Looks Like
Freshly installed film holds a thin layer of application solution between adhesive and glass. As it evaporates, you may see a faint haze, small uniform water beads, or a slightly milky sheen, all normal and self-clearing.
Typical timelines:
- Light haze or fine water beads: usually clears within 24 to 72 hours in warm, sunny conditions
- Larger water pockets: may take one to two weeks, longer in cool or humid weather
- Edge moisture: often the last to clear and the most likely to be mistaken for peeling
Curing speed depends on film thickness and type, ambient temperature, humidity, sunlight exposure, and window orientation. A sun-facing rear window cures faster than a shaded side window; cool, humid conditions can stretch curing to several weeks.
A Diagnostic Guide for Bubble Types
Use this framework to identify what you're looking at before deciding on a response.
| What you see | Likely cause | Typical response |
|---|---|---|
| Fine, uniform water beads or haze | Normal curing moisture | Wait and monitor |
| Large, irregular water pockets that shrink over time | Excess trapped water | Wait; monitor weekly |
| Small round hollow pocket that does not change | Trapped air | May be worked out during install; after curing, evaluate for rework |
| Bubble anchored around a visible speck | Trapped debris | Cannot cure out; section rework required |
| Elongated finger along an edge or curve | Squeegee contact loss or skipped shrink | Rework if it does not lay down during curing |
| Crease or sharp line in the film | Film handling or shrink error | Rework |
| Milky or lifting edge that spreads | Adhesive failure or contamination at edge | Rework |
Quality-Control Inspection Checklist
A final inspection pass, ideally after the film has settled a day or two, should check:
- No visible debris specks under the film
- No fingers or lifted edges around the perimeter
- No creases or sharp lines
Realistic expectations matter. A few fine water beads during the first week are normal, not a defect. A visible speck, a crease, or a lifting edge is a defect and should be corrected.
When to Wait, Monitor, or Rework
- Wait: uniform haze, fine beads, or water pockets that are visibly shrinking
- Monitor: edge moisture that persists past two weeks, or pockets that are not changing
- Rework: debris, creases, fingers that do not lay down, or edges that lift or turn milky
During curing, avoid rolling windows down, washing the tinted glass, or pressing on the film. Let it sit undisturbed for at least 72 hours before normal use. Patience prevents unnecessary rework, but recognizing a true defect early keeps a small problem from becoming a larger one.
How to Fix Peeling Window Tint and Prevent Future Issues
Peeling tint usually means the adhesive didn't bond properly, often because moisture got trapped at the edges or the film wasn't pressed firmly enough during installation.
If peeling occurs, the fix depends on severity.
The best prevention is proper edge sealing during installation. Spend extra time on edges, they're the most visible and most problem-prone.
Common Installation Mistakes That Cause Bubbles
Applying film in cold conditions. Cold film is brittle, creases easily, and doesn't conform smoothly.
Squeegeeing too lightly. Light pressure doesn't remove water effectively.
Ignoring edge sealing. Edges are where most problems start.
Applying film to dirty glass. This is the most common cause of visible imperfections.
The pattern is clear: most bubble problems come from skipping steps or rushing.
Preventing bubbles in professional window tinting comes down to preparation, technique, and patience. Our vehicle audio specialist team brings the same meticulous approach to every project, whether you're installing window tint, upgrading your vehicle's audio system, or exploring car audio installation services. If you're planning a window tint installation or want to discuss the right approach for your vehicle, get a free quote from our team.
Frequently Asked Questions
What causes bubbles in newly installed window tint?
Bubbles form from three main sources: trapped air pockets that weren't fully squeegeed during installation, moisture (water or steam) trapped beneath the film, and dust or debris on the glass or film backing. Air bubbles typically appear as small, distinct pockets, while water bubbles look hazy and may move slightly when you press on them. Professional installers prevent most bubbles through meticulous surface preparation, controlled application of installation solution, and precise squeegee technique to push air and water toward the film edges.
How long does it take for window tint bubbles to disappear?
Small water bubbles often disappear within 3-7 days as the adhesive cures and moisture evaporates, especially when the vehicle is parked in sunlight. Air bubbles may take 2-4 weeks to fully clear as the film continues to set and conform to the glass. However, bubbles caused by dirt or debris trapped during installation typically do not disappear on their own and may require professional repair. The exact timeline depends on temperature, humidity, and sunlight exposure during the curing period.
How do professional window tinters prevent bubbles?
Professionals prevent bubbles through a multi-step process: thorough glass cleaning to remove all dust and contamination, precise film cutting and handling to avoid creasing, controlled application of installation solution, and expert squeegee technique to systematically push air and water toward the edges. They also control workspace temperature and humidity to optimize adhesive curing, and they use proper film placement to avoid trapping air pockets. This combination of preparation, technique, and environmental control is what separates professional results from DIY attempts.
Can bubbling window tint be repaired, or does it need to be replaced?
Small water or air bubbles that form during the curing period often resolve on their own within a few weeks. However, if bubbles persist after the curing window or are caused by dirt trapped during installation, professional repair may be possible by carefully lifting and re-squeegeing the affected area. Large bubbles, wrinkles, or film damage typically require partial or full replacement. A professional installer can assess whether repair is practical or if replacement is the better option for a long-lasting, bubble-free result.
Ready to Upgrade Your Ride?
Call us at (714) 842-1250 or visit us at 16732 Beach Blvd Ste A, Huntington Beach.
Get a Free Quote