
Troubleshooting Electrical Issues After Stereo Installation
Last Updated: October 23, 2026
Quick Summary
Troubleshooting electrical issues after stereo installation starts with disconnecting the negative battery terminal, inspecting all connections for looseness or corrosion, and checking that the wiring harness adapter is firmly seated. Most problems stem from loose connections, blown fuses, or improper grounding that you can diagnose with a multimeter to verify voltage and continuity.
- Disconnect the negative battery terminal before touching any wires to prevent electrical shocks and shorts.
- A loose wiring harness adapter connection is one of the most common causes of electrical issues after installation.
- Use a multimeter set to DC voltage mode to measure approximately 12-14 volts at the battery and head unit power terminals.
- Route signal wires away from power wires and cross them at 90-degree angles to minimize electrical interference.
- If problems persist after checking connections and testing with a multimeter, seek professional help to rule out component faults or vehicle-specific compatibility issues.
Table of Contents
- Safety First: Disconnect and Inspect Before Troubleshooting
- Why Your Car Stereo Not Turning On After Installation
- Diagnosing When Your Car Stereo Fuse Keeps Blowing
- Addressing Car Amplifier Cutting Out During Use
- Eliminating Alternator Whine Through Car Speakers
- Using a Multimeter to Test Voltage and Continuity
- When to Stop Troubleshooting and Seek Professional Help
- Frequently Asked Questions
Safety First: Disconnect and Inspect Before Troubleshooting
Before you touch any wires or test equipment, safety comes first. Disconnect the negative battery terminal. This prevents electrical shocks and shorts that could damage your vehicle or the new stereo system.
Let the system sit for a few minutes after disconnecting. This allows residual power to drain. Then visually inspect all connections around the head unit and amplifier. Look for loose wires, bent connectors, or corrosion on terminals.
Check that the wiring harness adapter is seated firmly in both the factory connector and the aftermarket head unit. A loose connection here is one of the most common causes of electrical issues after stereo installation.
Why Your Car Stereo Not Turning On After Installation
Your car stereo not turning on after installation typically points to three culprits: a missing or loose power connection, a blown fuse, or a faulty remote turn-on wire. These account for the vast majority of no-power situations.
Check Power and Ground Connections
The power wire runs from the battery to the head unit. Trace it carefully from the battery terminal to the stereo. Look for any point where the wire might be pinched, cut, or loose. A damaged power wire stops current from reaching the stereo entirely.
The ground wire is equally critical. It connects the head unit's ground terminal to a clean metal point on the vehicle chassis. A poor ground connection causes power problems even if the power wire is perfect.
The fix is simple: disconnect the ground wire, sand the contact point on the chassis clean with medium-grit sandpaper, and reconnect. If you're uncertain about the installation or want to ensure it's done right the first time, our car audio installation service handles these connections with precision.
Inspect the Remote Turn-On Wire
The remote turn-on wire (also called the blue wire or blue-and-white wire) signals the amplifier to turn on when the head unit powers up.
Locate where this wire connects to the amplifier module. It should be firmly inserted into its terminal. If it's loose, push it in until you hear or feel a click.
Some installations run this wire through the firewall without proper grommeting. Over time, the wire can rub against sharp metal edges and the insulation wears through. Inspect the entire length of the blue wire for cuts or exposed copper.
Diagnosing When Your Car Stereo Fuse Keeps Blowing
A blown fuse after stereo installation means excessive current is flowing through the circuit. This happens when there's a short circuit in the wiring, a faulty component, or an incorrectly sized fuse.
Locate and Inspect Fuses
Most aftermarket head units use an inline fuse holder on the power wire near the battery. This fuse protects the entire system. Find this holder and check the fuse inside.
Replace the fuse with one of the same amperage rating. The rating is printed on the fuse itself. Use only the correct amperage.
If the fuse blows again immediately after replacement, do not keep replacing it. A repeatedly blown fuse signals a serious short circuit. Stop troubleshooting and move to the next section.
Your vehicle's main electrical panel may also have a fuse dedicated to the stereo circuit or the accessory power. Check your vehicle's manual for the location and rating.
Test for Short Circuits in Your Wiring
A short circuit occurs when the positive power wire touches a ground point or the negative battery terminal.
Inspect every inch of the power wire and all signal wires for damage. Look for cuts, melted insulation, or bare copper wire touching the vehicle chassis.
Gently tug on each wire connection at the head unit and amplifier. Connections should be snug and not move when pulled lightly. A loose connection that vibrates can eventually cause an intermittent short.
If you find a damaged wire, do not simply wrap it with tape. Cut out the damaged section, strip both ends, and solder the connection using rosin-core solder and a soldering iron.
Addressing Car Amplifier Cutting Out During Use
An amplifier that cuts out intermittently or stops working entirely during use usually has a power supply problem or a signal connection issue.
Check Amplifier Power Supply and Ground
The amplifier requires a solid power connection and ground just like the head unit. Trace the power wire from the battery to the amplifier's positive terminal. Check for loose connections, corrosion, or damaged insulation.
The ground wire from the amplifier should connect to a clean metal point on the vehicle chassis near the amplifier location. This is critical for amplifier stability.
Some amplifiers have a remote turn-on wire and a separate signal ground. Both must be connected correctly. Consult the amplifier's manual for the exact wiring diagram. Misconnecting these wires is a common mistake that leads to cutting out or no sound at all.
Verify Proper Signal Connection
The signal wires from the head unit to the amplifier must be routed away from power wires. Power wires and signal wires should not run parallel for long distances. When they do, electrical interference can corrupt the audio signal and cause the amplifier to mute or cut out.
If signal wires and power wires must cross, they should cross at a 90-degree angle. This minimizes interference. Use shielded signal cables if possible. The shield helps block electromagnetic noise from the power wiring.
Check that the RCA connectors at both the head unit and amplifier are seated firmly. A loose RCA connection can cause intermittent signal loss. Push each connector in until it clicks.
Eliminating Alternator Whine Through Car Speakers
Alternator whine is a high-pitched noise that increases with engine RPM. It's caused by electrical noise from the alternator coupling into the audio signal wires.
The fix involves proper grounding and signal wire routing. First, verify that the head unit and amplifier grounds are solid. A weak ground allows noise to couple into the system more easily.
Next, check the RCA signal cables. They should be routed away from the power wiring, battery, and alternator. Use shielded RCA cables.
If alternator whine persists, add a ground cable from the head unit chassis to the vehicle chassis. This dedicated ground for the head unit can eliminate noise that the main ground wire doesn't address.
Using a Multimeter to Test Voltage and Continuity
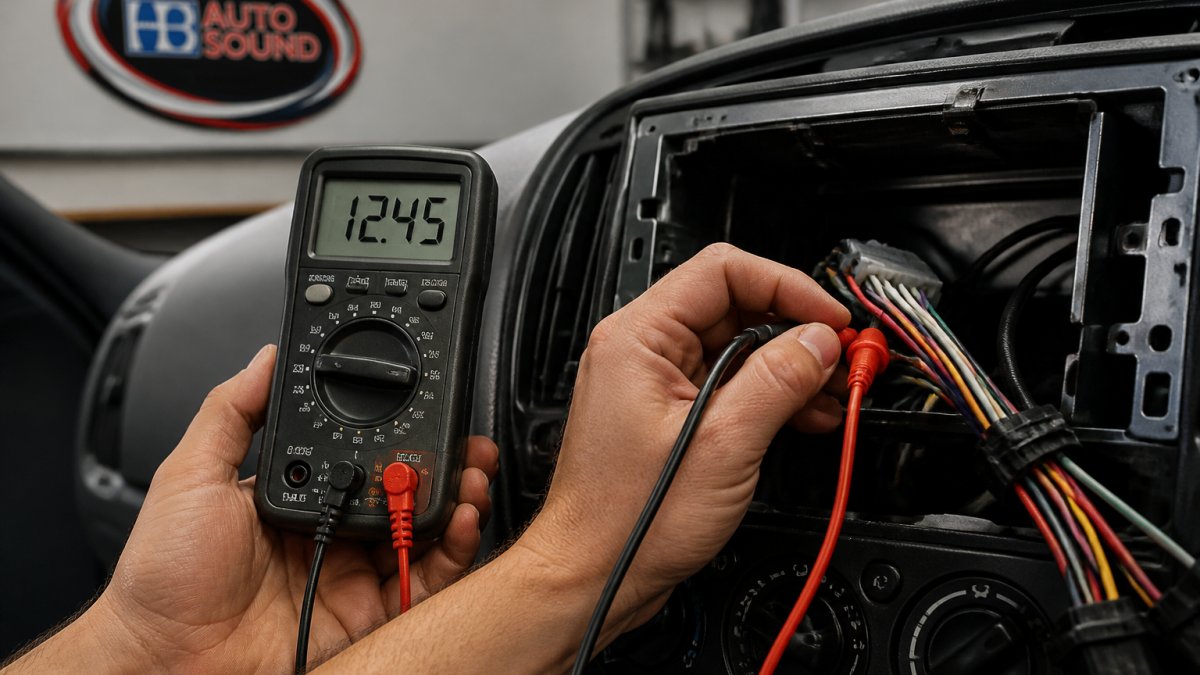
A multimeter is your best tool for troubleshooting electrical issues after stereo installation. It measures voltage, resistance, and continuity. Learning to use one correctly saves hours of guesswork.
Measure Voltage at Key Points
Set your multimeter to DC voltage mode. The scale should be set to 20 volts or higher. Touch the black probe to a good ground point on the vehicle chassis.
Now check the voltage at the head unit's power terminal with the ignition on. The reading should be close to the battery voltage.
Check the voltage at the amplifier's power terminal as well. Again, it should be close to battery voltage.
Measure the voltage on the remote turn-on wire. With the head unit off, this wire should read 0 volts. With the head unit on, it should read close to 12 volts.
Test Continuity in Wiring
Continuity testing checks whether a wire or connection allows current to flow. Set your multimeter to continuity or resistance mode. This is often marked with an ohm symbol or a sound wave symbol.
Disconnect the component you're testing from power first. Then touch the black probe to one end of the wire and the red probe to the other end.
If the meter shows very high resistance or no continuity, the wire is broken or has a bad connection inside the insulation.
Test the ground wire by checking continuity between the ground terminal at the head unit and the chassis ground point. A good ground connection shows very low resistance.
When to Stop Troubleshooting and Seek Professional Help
If you've checked all the connections, tested with a multimeter, and the problem persists, it's time to call a professional.
Persistent electrical gremlins after installation may indicate a vehicle-specific compatibility issue. Some factory systems use data-bus wiring that conflicts with aftermarket head units.
If the head unit or amplifier itself is faulty, no amount of wire checking will fix it.
Our certified vehicle audio specialists handle complex installations and troubleshooting every day. We can recommend the right components for your vehicle and make proper recommendations based on your needs and preferences.
Troubleshooting electrical issues after stereo installation is frustrating, but most problems stem from loose connections, blown fuses, or improper grounding.
Frequently Asked Questions
What should you check if a new car stereo will not turn on?
Start by checking the power and ground connections at the head unit and battery. Verify the remote turn-on wire is properly connected to the stereo's blue wire. Inspect all wiring for loose, damaged, or incorrectly connected cables. Use a multimeter to test for voltage at the power wire and continuity at the ground connection. If all connections look solid and voltage is present, the issue may be a blown fuse or a defective head unit.
Why does a car stereo fuse keep blowing after installation?
Repeated blown fuses typically indicate a short circuit in your wiring harness or power wire. Check for damaged insulation, cut wires, or pinched cables that may be touching the vehicle's metal frame. Ensure the power wire doesn't run near sharp edges or heat sources. A short between the positive power wire and ground will blow the fuse repeatedly. If you find no visible damage, the head unit itself may be faulty and require replacement.
How can I tell if my car amplifier is cutting out due to a wiring problem?
An amplifier cutting out usually points to a power supply issue, poor ground connection, or signal interference. Check that the amplifier's power and ground wires are securely fastened and free of corrosion. Verify the remote turn-on wire is properly connected. Test voltage at the amplifier's power input using a multimeter. If voltage drops when the amplifier cuts out, you likely have a loose connection or inadequate ground. Poor signal-level input can also cause cutting; ensure RCA cables are shielded and separated from power wires.
What causes alternator whine in car speakers after stereo installation?
Alternator whine is a high-pitched noise that occurs when electrical noise from your vehicle's alternator couples into the audio signal. This happens when RCA cables (which carry the audio signal) run too close to power wires or are not properly shielded. To eliminate it, route RCA cables away from the power wire and amplifier power supply, use shielded or twisted RCA cables, and ensure your ground connection is solid and located close to the head unit. A poor ground is often the root cause of signal interference issues.

Ready to Upgrade Your Ride?
Call us at (714) 842-1250 or visit us at 16732 Beach Blvd Ste A, Huntington Beach.
Get a Free Quote